
What is Google AMP and is It Still a Thing in 2025?
Accelerated Mobile Pages, or AMP, is an open-source framework launched in 2016 by Google and backed up by big tech companies like WordPress, LinkedIn, Twitter, and others.
But is Google AMP something many publishers use today?
This article explains if AMP is still relevant in 2025, AMP’s benefits and limitations, and if publishers should build AMP pages for their websites.
What is Google AMP?
Google AMP is an HTML project designed to create fast-loading and lightweight mobile pages.
AMP was developed in response to Facebook’s Instant Articles and Apple News, allowing mobile users to consume content quickly and easily from their phones.
However, AMP isn’t app-bound, and any publisher can optimize its mobile content on the open web.
Facebook Instant Article Example
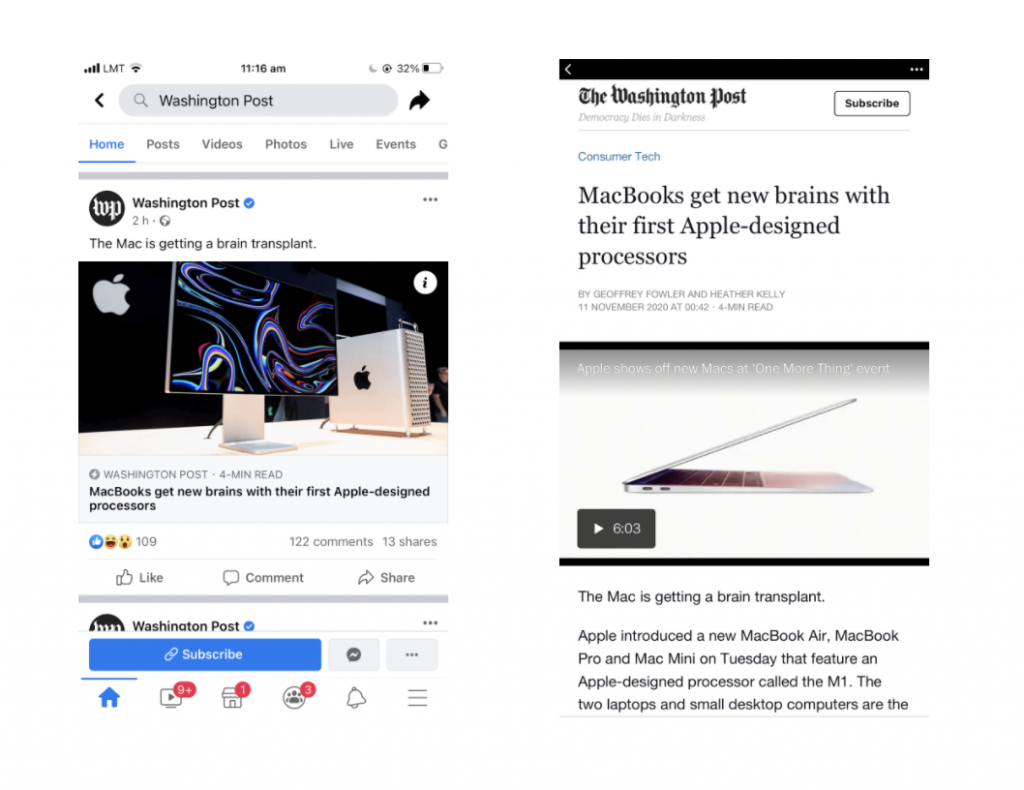
Source: Washington Post
AMP Website Examples
You might remember AMP pages by a distinctive lighting bolt icon in top places in search results.
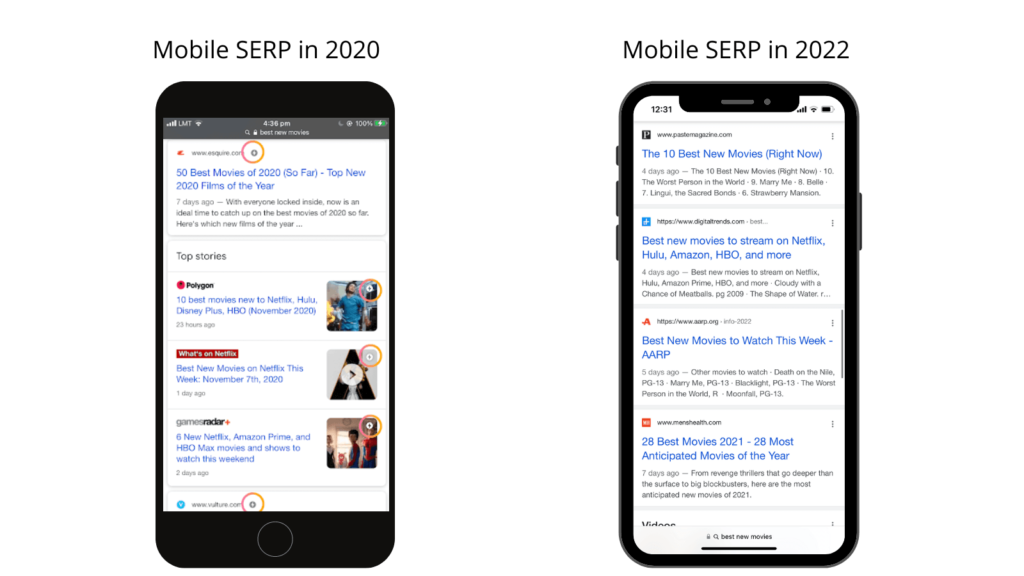
However, as of May 2020, Google ditched the AMP badge and stopped prioritizing AMP format in its Top Stories carousel. So there is virtually no difference between AMP and non-AMP pages in SERP now.
How Does AMP Work?
AMP works by creating a streamlined version of the HTML code which helps to improve website loading speed on mobile devices.
Why do AMP pages load faster?
The pages load faster because certain elements like JavaScript and CSS are eliminated. Some regular HTML tags are replaced with custom AMP HTML tags for improved performance.
This picture below shows how AMP pages work.
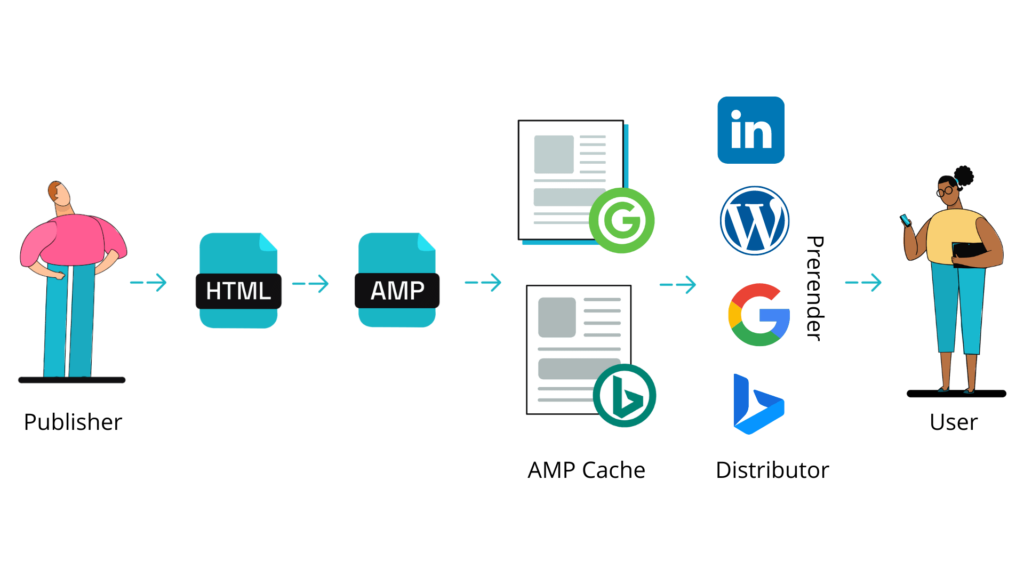
First, a publisher creates an AMP version of his original HTML document. The AMP-optimized page is hosted on Google’s servers. Google pre-renders and caches content before someone clicks on the page in search results.
Then, a user will be able to see content in two ways:
- Through Google AMP Viewer–a user lands on your page from the Top Stories carousel. The domain, in this case, is Google’s. AMP Viewer acts as a hybrid environment for collecting user data.

- v–a user will see your domain’s name. This technology allows the browser to treat the document as belonging to the publisher. The content will be delivered in addition to AMP HTML and appears in standard results.

Benefits of AMP
There are 6 potential benefits of AMP.
- Increased Page Speed
AMP itself is not a ranking factor, but thanks to its speed advantage, it greatly benefits your mobile SEO.
According to Littledata, the average mobile page load time as of February 2022 was 4.5 seconds. Anything < 3 seconds is a good mobile page speed and would put you in the top 20% of the sites.
However, it’s worth mentioning that lightning-fast performance is achieved when the AMP page is visited from a Google search. That’s because Google caches, optimizes, and validates AMP documents in its AMP Cache, which is essentially a CDN (Content Delivery Network) for AMP pages.
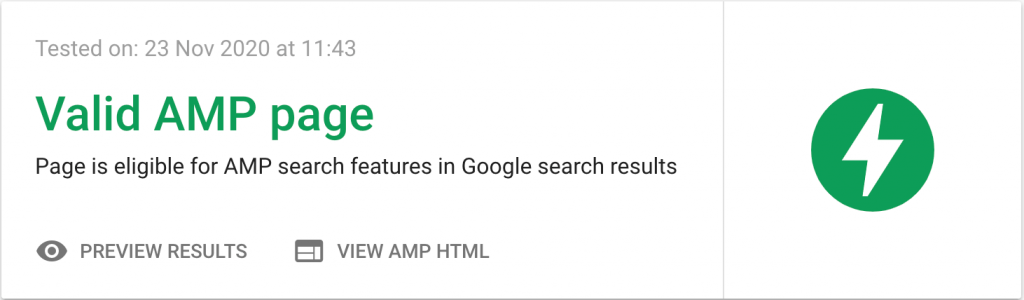
A picture below shows a valid AMP page compared to the same URL passed through Google’s AMP Cache.
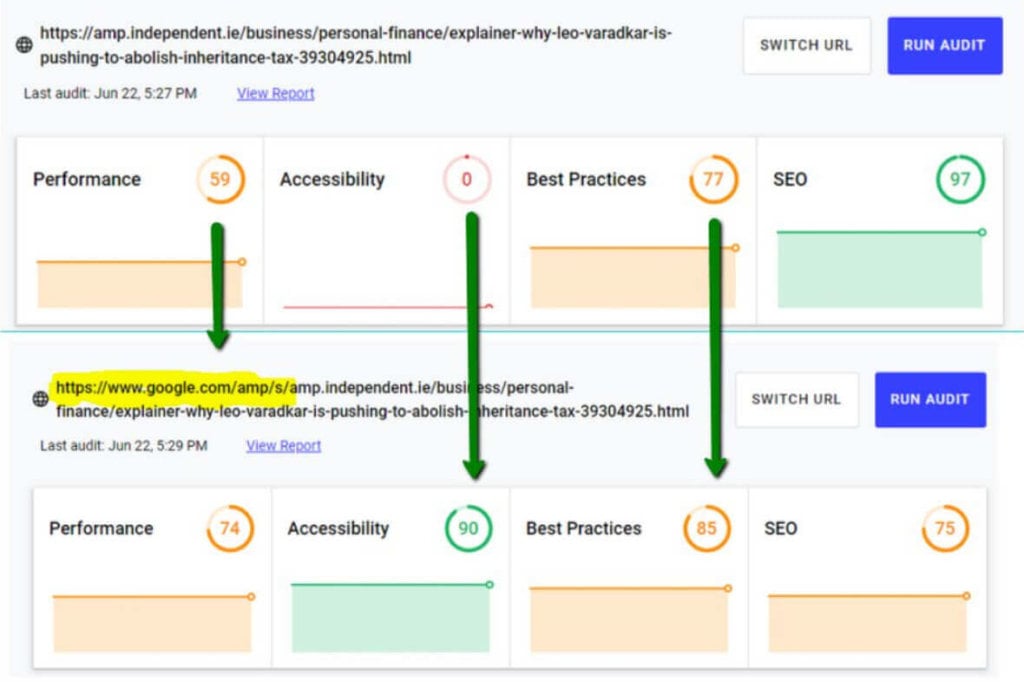
Source: Search Engine Land
- Low Bounce Rate
Bounce rate is directly affected by the page’s speed. Latest data showed that the chance of a bounce increased by 32% when a page load time went from 1 to 3 seconds. With faster page speed, a user will spend more time on a site and more likely convert into a customer.
- Less Mobile Data Usage
AMP uses fewer data over 3G and 4G networks. Lighter pages load faster, which is especially critical for mobile users whose connections are slower.
- Increased SERP visibility
In combination with structured data, AMP pages have more chances to appear in Google search, for example, as part of rich results.
Rich Results Example
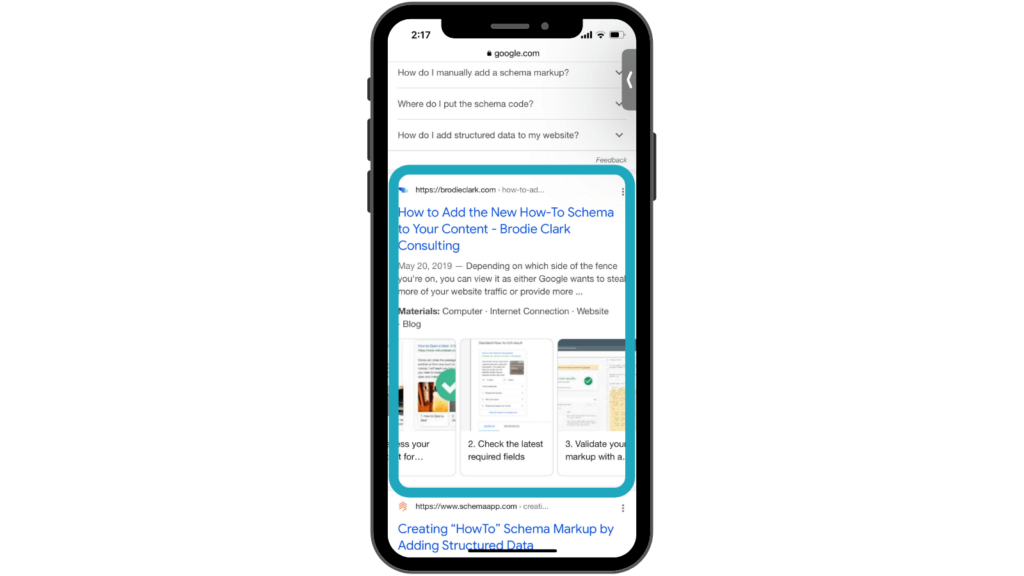
Note that AMP is not a requirement to appear in top SERP placements, but it will send a signal to Google that your page is fast and reliable. Adding structured data will help Google better understand your content and, possibly, rank it higher.
- Swipe to Visit Feature
Swipe to Visit utilizes AMP’s prerender capability to show a preview of the page displayed at the bottom of the screen. If a user wants to swipe up, an entire web page will instantly load, and a publisher will receive a pageview.
- Top Stories
Top Stories carousel is a sweet spot for all digital publishers.
Displaying at the top of the SERP presents a whole new opportunity to drive organic traffic to your website.
Top Stories Example
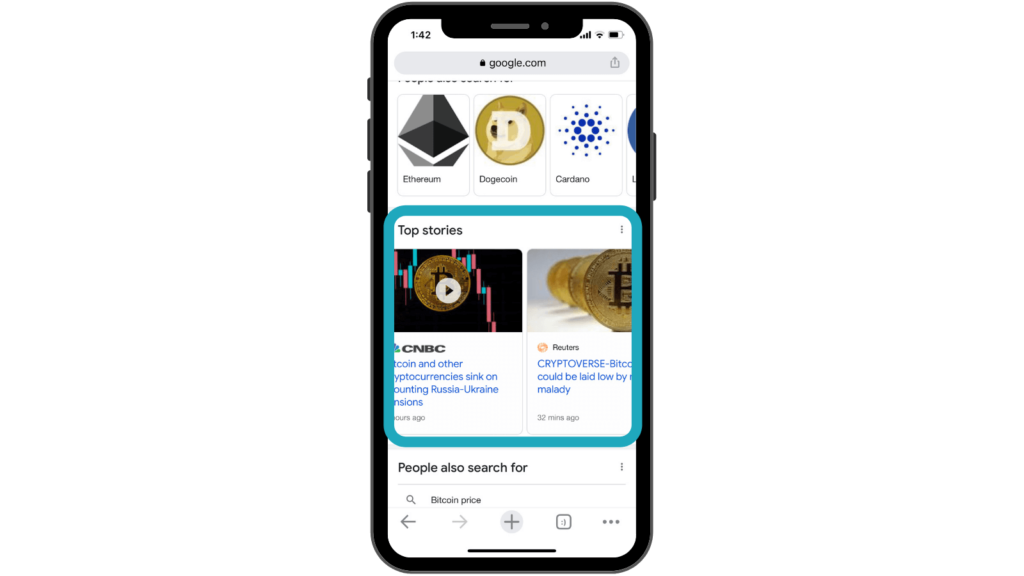
However, in May 2020, Google removed the AMP requirement for appearing in Top Stories. The Top Stories ranking will now be determined by the Page Experience update,which is a part of Core Web Vitals.
Nonetheless, according to Newzdash’s AMP Tracker, non-AMP results accounted only for 31% of the Top Stories content in the U.S. and U.K. as of February 22, 2022. This pretty much shows that AMP is still there.
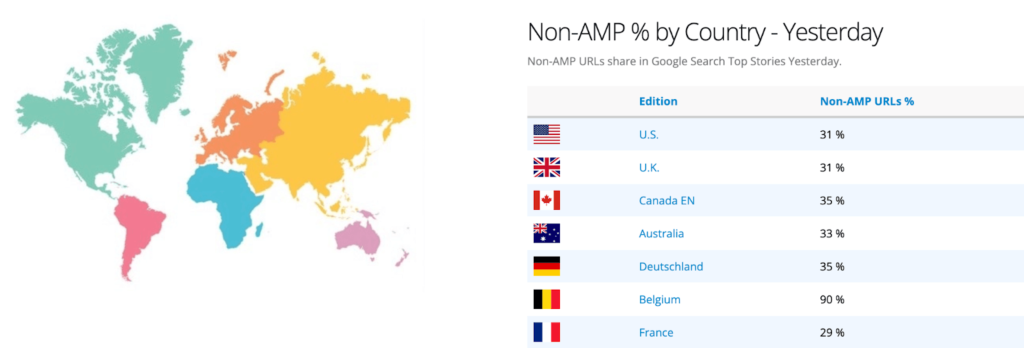
Source: Newzdash
Limitations of AMP
There are 3 main limitations of AMP.
- Less Functionality
AMP is a restrictive framework that only allows inline CSS up to 75kB and third-party JS up to 150kB, making functionality and engagement with a webpage limited.
Mostly, publishers need to use pre-built AMP libraries that ensure high speed. Due to this limitation, AMP pages might have a very different “stripped-down” look than their non-AMP equivalent.
- Weak Brand Identity
When users land on your page from Google AMP Viewer, they do not see your web page URL. The original URL is stored under the info button at the top of the AMP page.
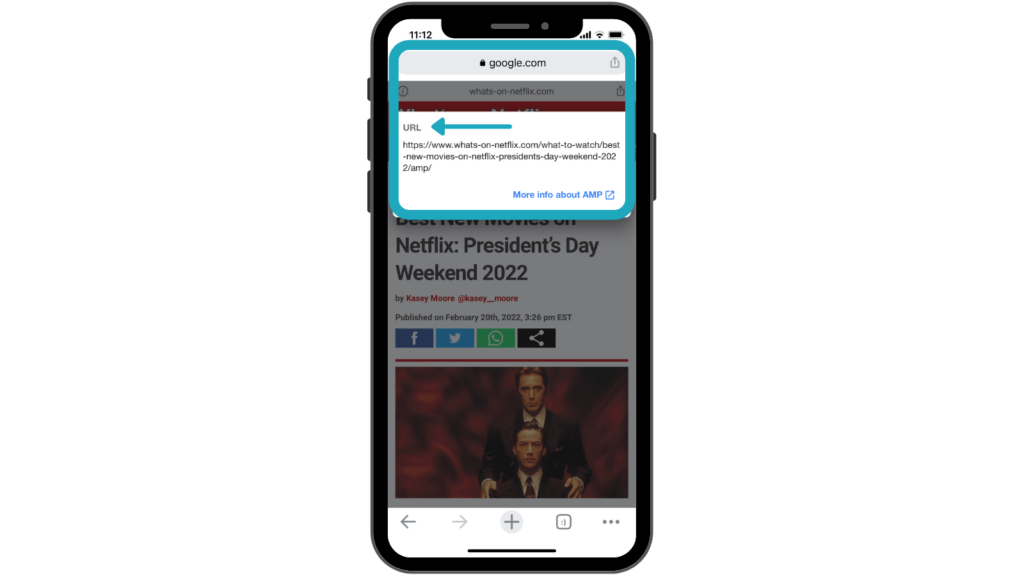
This is confusing to the visitors and also creates an analytics challenge for publishers in identifying where the traffic came from.
There are, however, technical solutions to this limitation like Cloudflare’s AMP Real URL that allows AMP pages to be served from a cache and contain an original URL in the browser’s navigation bar.
- Double Legwork
From a developer’s perspective, even simple features, like the submission form, require a lot of work to make AMP-compatible, which typically isn’t a difficult task for a non-AMP page.
Moreover, just like with a regular page, once your AMP page is live, you will still need to optimize to make it SEO-friendly.
AMP Monetization
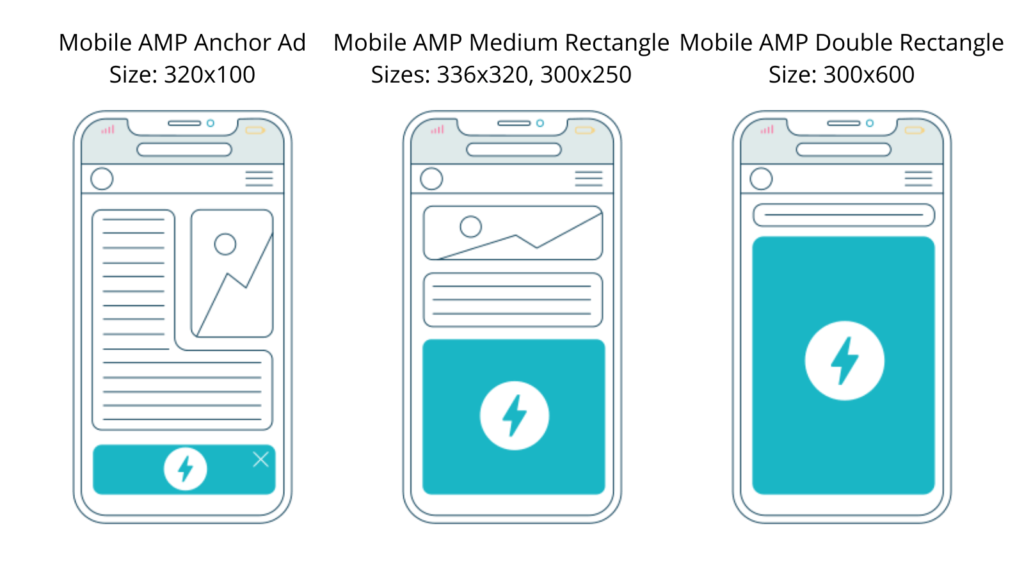
AMP supports website monetization. Because of their reduced size, AMP ads load faster and achieve higher ad viewability and CPMs for publishers.
If you want to display AMP ads, Setupad offers fully AMP-compatible ad tags in different sizes.
How to Implement Google AMP on WordPress?
Step 1: Install AMP plugin
We suggest choosing between the official AMP plugin or AMP for WP – Accelerated Mobile Pages. Which plugin is best for you depends on your preferences and priorities.
Remember, each plugin comes with additional weight, which can be bad for the web page’s speed, so make sure you use as few plugins as possible.
AMP

The official AMP plugin for WordPress is a no-brainer. It is the most straightforward and intuitive plugin which will convert all your posts into AMP versions seamlessly.
With the AMP plugin, you will benefit from 3 template modes and will be able to generate AMP-valid markups. Thanks to a recent update, AMP is now fully compatible with Yoast SEO and WP Forms plugins, meaning their features will be supported by default when you activate the AMP plugin.
How to install the AMP plugin?
- Log in to your WordPress account
- Click ‘Add New’ under the Plugins tab and search ‘AMP for WordPress’
- Install the first plugin called ‘AMP’
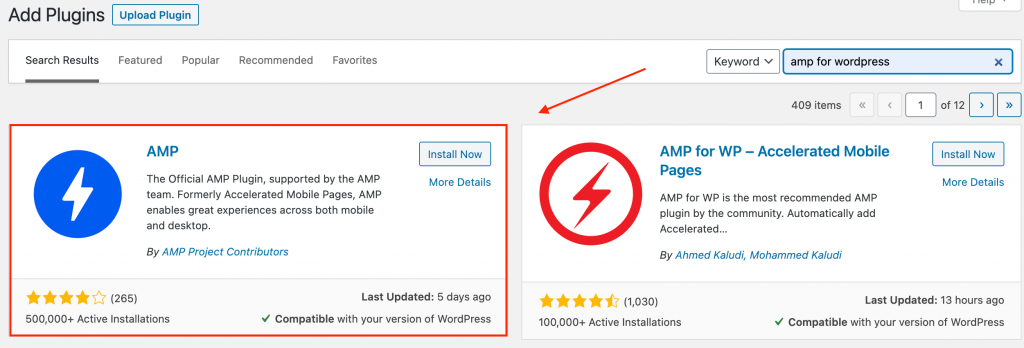
AMP plugin is an excellent and easy solution, however, it has limited functionality and customization options compared to its alternative–AMP for WP (discussed next).
For example, you will not be able to use structured data for logo and post image, drag-and-drop page builder, custom-style CSS, among other things.
AMP for WP – Accelerated Mobile Pages
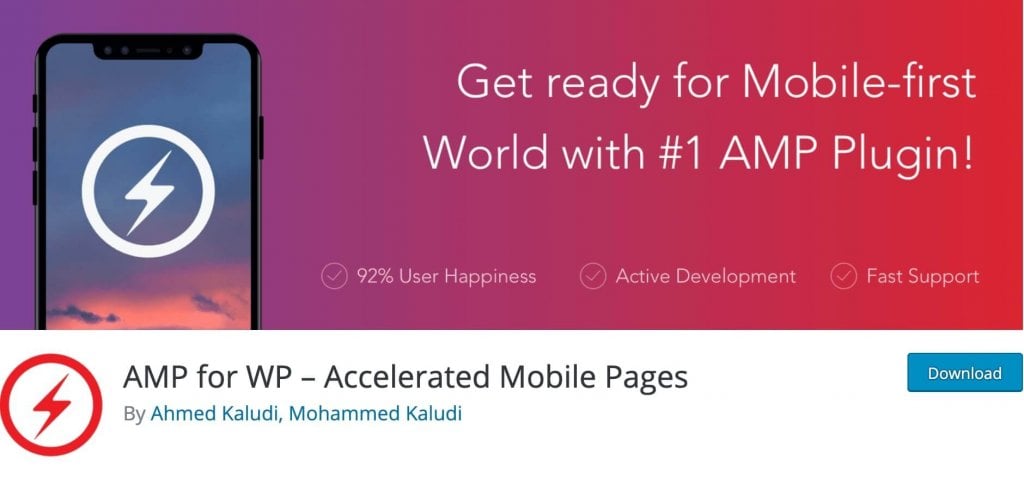
This plugin has a lot more customization options than the previous one. For example, you can choose from various pre-designed templates or create your own under the Design tab. You can also use custom CSS (Cascading Style Sheets).
This plugin also has an extensive list of paid features:
- Email opt-in support (such as when a visitor is given an option to join a mailing list)
- Call-to-action (CTA) support
- AdSense support
- Ninja Form, Contact Form 7, Caldera Form, and Graviry Form support
- Advanced WooCommerce support
- Third-party analytics support, including Chartbeat, comScore, Statcounter, and more.
Overall, this plugin has the most to offer and has the most sophisticated customization options. However, if you’re not very tech-savvy and don’t run a website with a lot of structured data and rich user experience, the previous AMP plugin will do the job.
Regardless of which plugin you choose to install, make sure to configure your plugin settings, such as selecting the preferred design, adjusting the color scheme, enabling AMP support for different media types, and customizing CSS styling.
Step 2: Set Up Google Analytics
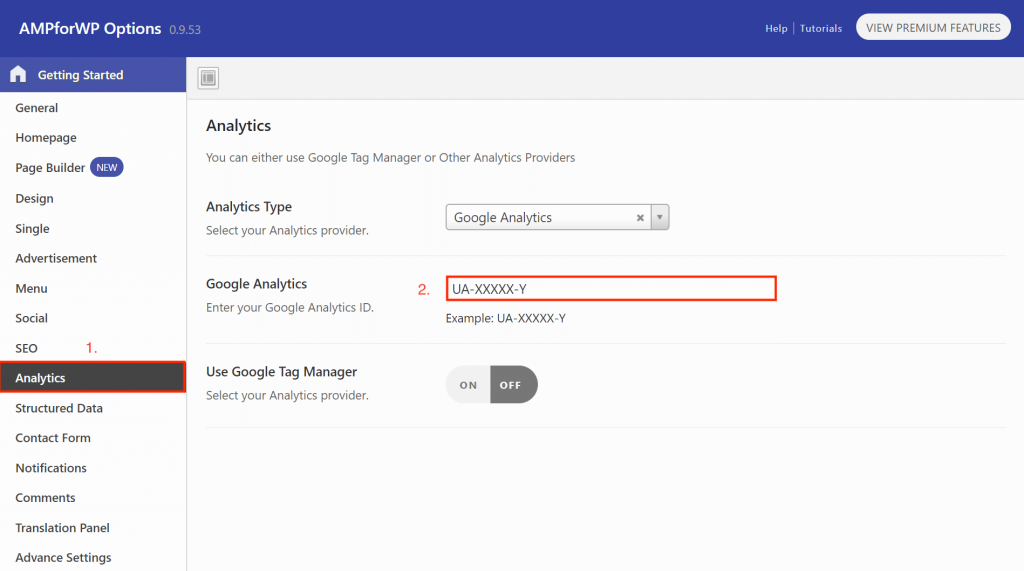
If the plugin supports third-party data analytics, you should definitely make use of it. We used Google Analytics in the example below, but your plugin may also support other analytics providers.
To enable Google Analytics on your AMP pages, you will need to copy your tracking ID from your Google Analytics Admin panel.
- Log in to your Google Analytics and click on the gear icon ‘Admin’ in the bottom left
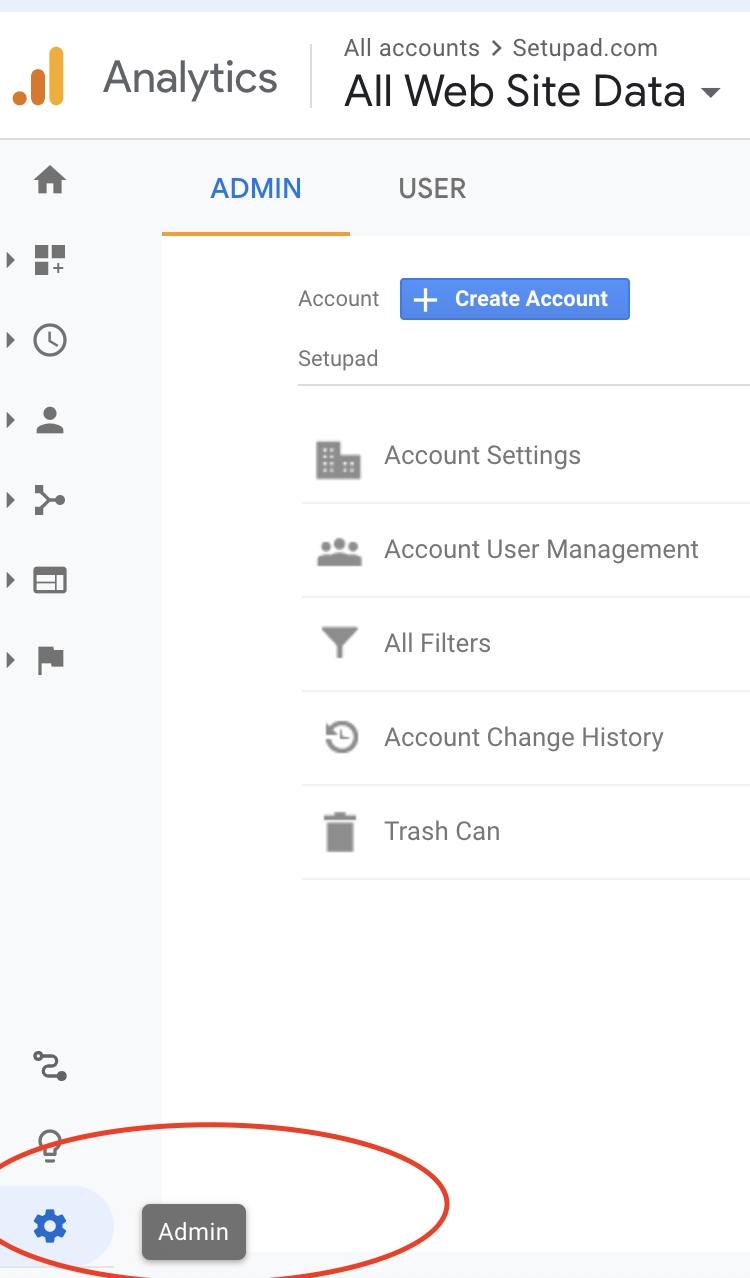
- You will see your ‘Tracking ID’ under the Property menu (it will begin with UA)
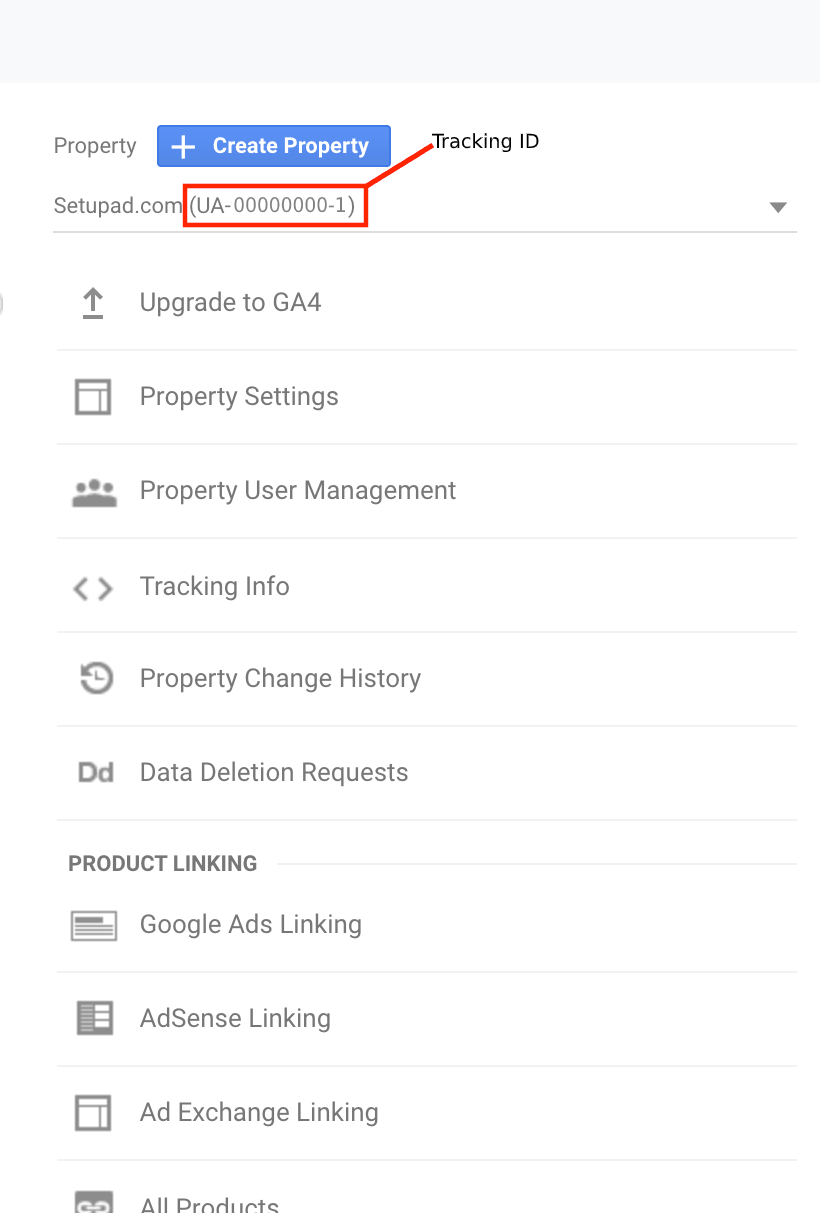
- Copy your ‘Tracking ID’ and paste it into your WordPress AMP > Analytics log
- Click ‘Save Changes’
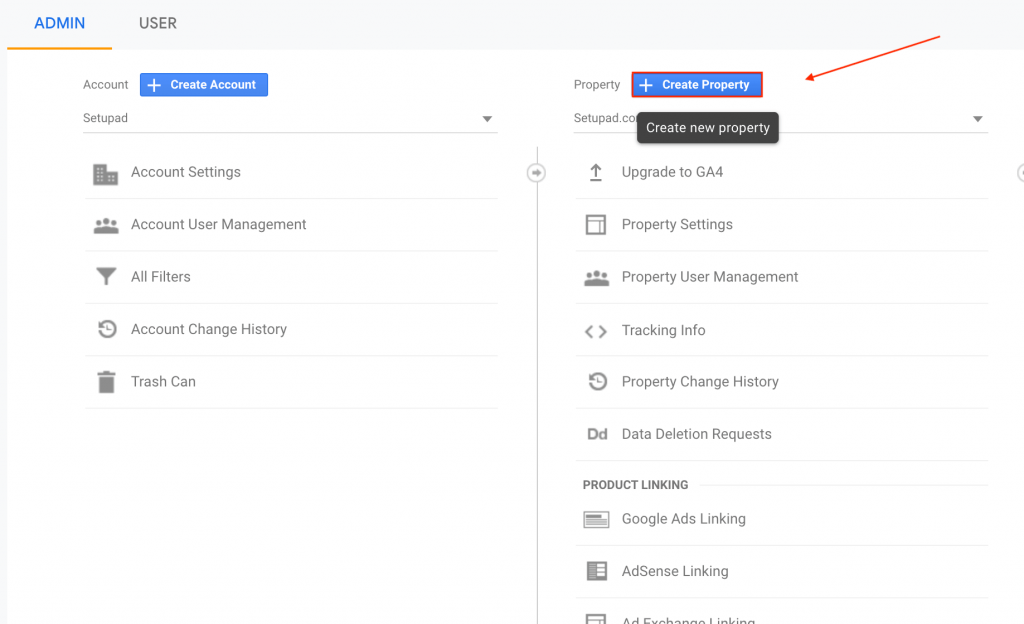
You may also need to create a new property if you don’t have one. To do so, copy the same steps as described above and from the Admin menu:
- Click ‘Create Property’
- Fill in the field and select ‘Get Tracking ID’
Step 3: Validate WordPress AMP Site
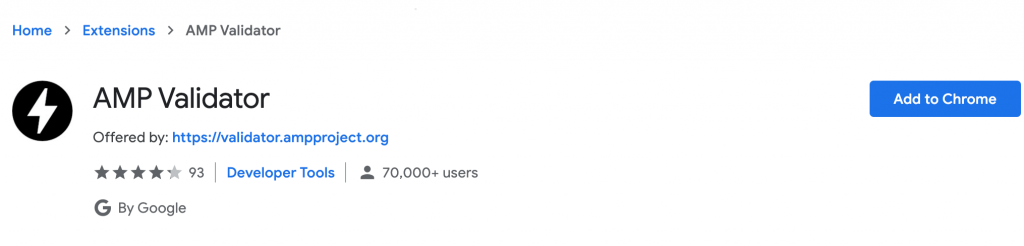
AMP Validator Extension
You will need to validate your AMP site to ensure it can be accessed and linked to. If you don’t configure it correctly, Google will not display it in search results, so make sure you do not skip this step.
The easiest way to do this is to use the AMP Validator Chrome extension. It will run your page through AMP Validator and report pass or fail.
AMP Test
You can also go to https://search.google.com/test/amp, drop your URL, and click ‘Run Test’. The result will show if your page is validated or not.
In most cases, you might see an error message because you have used HTML tags that are no longer supported by AMP. Make sure to check the full list of supported tags beforehand.
Step 4: Fix the Errors
For this step, you can use your browser’s Developer Tools Console. For Google Chrome, this is the Chrome DevTools console (see example below).
Steps how to do this:
- Open the AMP page in your browser (it should have /amp or /?amp in the URL)
- Append #development=1 to your page’s URL
Your link should look like this:
https://example.com/example/amp/#development=1
- From the Chrome menu, select ‘More tools’ > ‘Development tools’, and then click the ‘Console’ tab
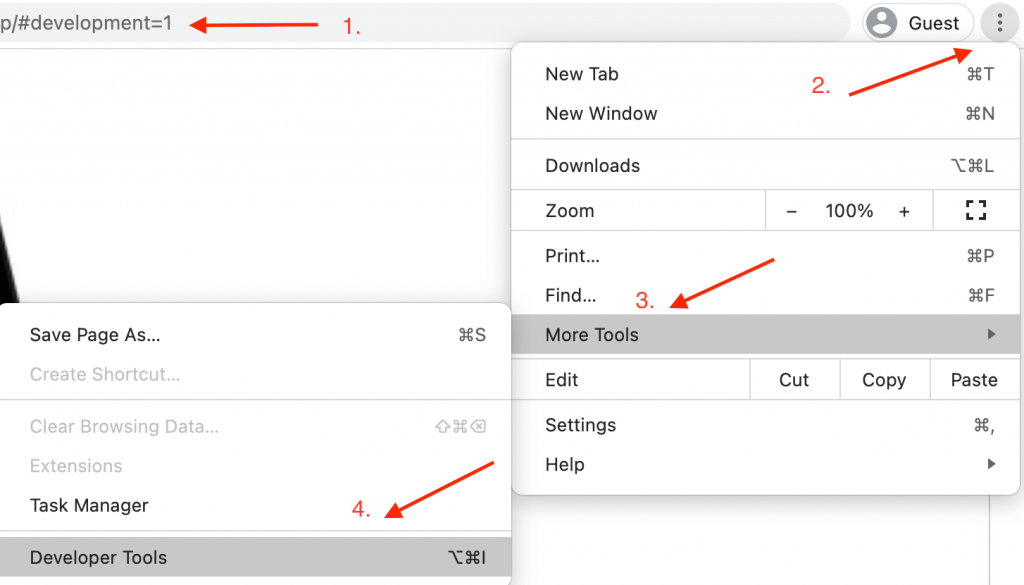
- Check the errors. (If any errors are present, they will be highlighted)

Normally, you will be able to auto-fix all errors. However, the AMP project also has a full list of common errors and ways to fix them.
Step 5: Test your Speed
This is optional, but you may want to find out how your speed increased with AMP. Use a simple tool like PageSpeed Insights to measure your efforts.
Should I Use AMP?
When Google deprecated AMP from its Top Stories placement on search, many decided that Google AMP became unnecessary. While there is some truth in this, nothing is that simple.
Google continues to support AMP and link to AMP pages when possible. AMP success varies greatly from website to website but it’s impossible to understate the obvious SEO benefits for your site.
AMP gives a competitive advantage for Core Web Vitals performance metrics and may even boost your search visibility. So, from a business perspective, if you already have an AMP page, you should keep it and continue to optimize it.
On the other hand, many developers believe it is possible to build fast-loading pages without sacrificing functionality. Cloudflare for Mobile is an example of an alternative solution that boasts similar features and speed as AMP.
At this point, we leave it up to you to decide whether AMP is the right fit for your site. If you still have questions, leave a comment below!